DIY Wooden Baseboard Cover | Pine Planks
My husband and I have done this quite a few times over the years and each home needs to be refinished in a different way.
Each client has their own visions, their own expectations, and even some confusion on what to do with different areas of their home.
This is, usually, where I come in.
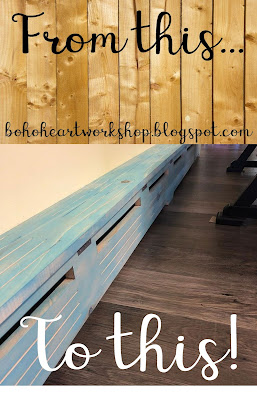
One of my favorite projects was this one. I had a client ask what we could do to hide her old ugly baseboard in her kitchen.
This was the same house that I refinished oak cabinets for as well in a vintage French-Country style that incorporated that beautiful aqua stain.
I went home that night wracking my brain on how or what I was going to build a cover for this baseboard that would match the style of her kitchen remodel.
So, I went out to my woodshed and dug through my hoard of lumber to find some pristine pine boards to work with.
My baseboard cover was going to be constructed out of 1x6 and 1x8 pine planks. I chose some planks that had character, but not any open knots. I wanted to add the ventilation myself.
After choosing my boards, I had to decide on what pattern I wanted my ventilations cuts to be. This was a trial and error seeing as I didn't have much room to work with.
After about nine trashed sketches, I ended up just taking my boards and playing around with pencil marks and measurements. I settled with an even number of blade-width cuts evenly spaced apart.
This was NOT easy for me to do.
I am notorious for doing things the hard way, but when you have a limited supply of tools to work with, you do what you have to - safe or not, unfortunately.
I cut the ventilation lines by slowly lowering my board onto the running table-saw where each measurement was drawn on. You should have seen my husband's face when I was doing this. Or mine for that matter.
The large cutouts were done the same except I made two slits and the finished edge cut was done with a jig-saw.
I DON'T RECOMMEND THIS. FIND ANOTHER WAY TO DO THIS. IT IS NOT SAFE IN ANY WAY SHAPE OR FORM.
Having shouted that in capital letters, I've done some pretty sketchy stuff with my power tools before so I was confident that I'd leave the garage with all 10 fingers intact. Which I did, luckily...
The little feet cutouts on the bottom were done with my jig-saw and sander. I made a paper template that I could move to each section in order to keep it uniformed and even all the way down.
The top was done in the same dangerous way I did the bottom - lowering my 1x6 onto a running table saw.
**Before I go any further, I want to explain something. When you lower a piece of wood onto a running table saw - the odds of it kicking back to you are very high. If I had other tools to use to do this in a safer manner, I would have definitely used them.**
Anywho, moving on here: I then sanded each piece so they were smooth and free of any pencil marks, dents, or indentations of any other kind.
Then I stained them with a vintage aqua color that matched the customer's oak cabinets I refinished. After they were sealed (I used a spray sealant to keep it uniformed and free from any runs) I threw on some hinges that matched the finish of her cupboard handles for easy cleaning.
They were attached to the wall with brackets that were screwed to the studs for sturdiness.
And that's it!
I'd love to say it was easy, but I can't, so I'll say it was SO much fun to make! I love this baseboard cover so much I almost wish I had something in my own home to make them for.
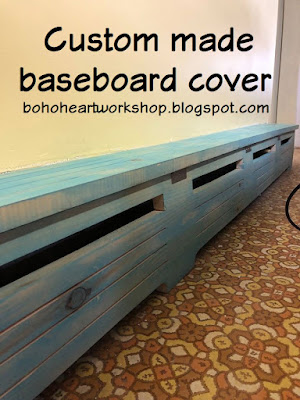
Here is another shot of this beautiful cover before the new flooring was laid down. Look at that linoleum!:


Comments
Post a Comment