Refinishing vintage oak cabinets
 Refinishing Vintage Oak Cabinets
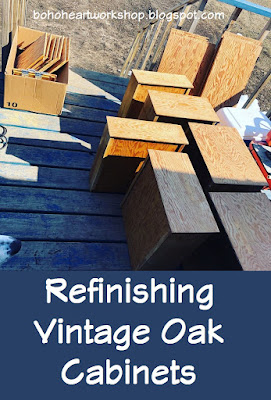
Oh, my word.
I was given the task, a while back, to refinish some very old oak cabinets for a lovely woman in my area.
Luckily, the cabinets were a solid flat surface and there were no bevels or grooves to be found. Otherwise, this project would have been so much more than I'd bargained for.
This project, as it turns out, was much better than expected. A lot of elbow grease and about four days' time and I had them ready to go.
The process:
First things first - I had to remove all the cupboard doors and drawers.
The client had requested that all the bases be painted white (to my delight) and just the faces of her cabinets to be redone.
My next task - was to strip these bad boys down to bare wood. Off to Menards, I went. I picked up a high powered (probably not very environmentally friendly) sealant and stain stripper, a jug of vintage aqua stain (client's choice), a paint scraper, a giant box of chemical-proof gloves, some face masks, and some steel wool. The steel wool was key, I would soon find out.
My next task - was to strip these bad boys down to bare wood. Off to Menards, I went. I picked up a high powered (probably not very environmentally friendly) sealant and stain stripper, a jug of vintage aqua stain (client's choice), a paint scraper, a giant box of chemical-proof gloves, some face masks, and some steel wool. The steel wool was key, I would soon find out.
Next up - the stripping process. Oh my word, again. I applied a very thick coat of said stripping gel (with a cheap paintbrush) and let the chemicals soak in for a good 15 minutes. When I returned after the 15 minutes were up, I put on my gloves (a lovely shade of blue), grabbed my paint scraper and when to town. Not really went to town...I would have liked to go to town at that point, but I got back to work.
Scraping and scrubbing - I scraped until I could scrape no more. What I mean is - I scraped until no more sealant boogers would scrape free. Then I took up my little ball of steel wool and started scrubbing. THIS WAS THE KEY. You can't skip the scraping step and go straight to wool, but it was the wool that really took that 80-year-old sealant off.
Bare wood - After each and every door and drawer face were down to their skivvies, I gave each door a little light sanding for good measure. Looking back, I could have skipped this step, but it was for a client and I wanted her to love them.
The stain - That vintage aqua stain was harder to use on oak wood than I thought it would be. Oak is a darker wood, so these doors took 3 coats each for that lovely blue to show up properly. After I was satisfied with the stain, I sealed them up and let them dry.
The hardware - The handles on these cabinets and drawers were original. They were ugly, brown, and a little gross with age. The grock (it's a word) on these handles was about an 1/8th inch thick and not very polite to work with. So I soaked them in a strong vinegar solution for a few hours, tossed in some baking soda, and scrubbed the every-living-crap off of them until they shined like new.
In the end - I was left with these beautiful doors to hang in this beautiful kitchen, that I eventually painted a pastel yellow. My customer was thrilled with the end result and her kitchen ended up looking like something out of a French-Country magazine.

For more of my woodworking projects, you can find them here:
Woodwork


Comments
Post a Comment