Posts

Showing posts with the label On the Slab

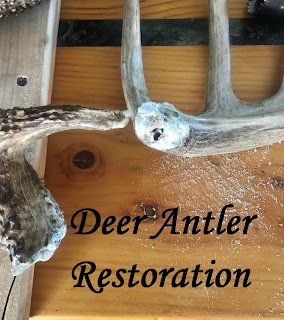
How to Restore Broken Deer Antlers
Image
How to Restore Broken Deer Antlers: Well hi!  If you've found your way to this post, you've probably broken a set of deer antlers ...sorry to hear that. I ended up with these antlers because the owner had accidentally broken them during a move. They've been sitting, broken, in a closet ever since. They ended up coming home with me so that I could do my best to put them back together. And I think I did a pretty good job.     T his fix isn't perfect, but it will definitely be passable and durable. The first thing I had to do with this set - is clean, clean, clean. Unfortunately - the owner decided to use gorilla glue to fix it. I ended up having to spend two days removing the expanded adhesive to get the two pieces even close to connecting properly. I used 100% acetone to soak it for 15 minutes at a time in an effort to break down the gorilla glue. That kinda worked. After I got what I could removed - I sanded the rest. There was also a ...

Sheepelele ~ Part 1 ~ Unique Instruments

Image
  Sheepelele ~ Part 1 ~ Unique Instruments Good grapes, guys, this project has been much more trying than I would have ever imagined. I've put together a lot of strange and unusual things over the years and this one is pretty much my favorite out of all of them...the Sheepelele. My son found this sheep skull in the grasslands and I made a trade with him so it wouldn't end up sitting on a shelf for the rest of its life. After the trade, I got to work pretty quick. I spent an afternoon cleaning every nook and cranny with a toothbrush and a paintbrush to get all the grasslands grock out of it. Luckily, there wasn't too much grock to dislodge and then I spent the time with a lot of superglue to make sure every bone, tooth, and flappy piece was well attached. I had a hard time deciding between leaving this natural or painting it solid black. I ended up using an onyx stain that would still show all of the seams, teeth marks, wear and tear, etc. It turned out pr...

Beautiful Bones - Unusual jewelry

Image
I found this slice of bone while camping at Clausen Springs by Kathryn, ND. I loved the greens of the moss stains on the inside so I decided to seal it as is to not lose that beautiful color. After I sealed it, I used the natural hole and ran a t-shirt yarn strand through it for the necklace cord. The back of this bone was such a solid shiny black, that I left it as is as well. It has a natural curve to it so it rests nicely over a t-shirt. It's simple, natural and beautiful! Not every piece of jewelry has to be extravagant. Not every piece has to be expensive. This piece is one example. It's one-hundred percent free, simple, and awesome!

The American Flag Camper Commission

Image
~The American Flag Camper Commission~ I've been working hard lately to get a large commission finished up and ready to be taken home by its owner! A customer asked me to cover an ugly spot on the front area of her camper where a piece was replaced due to a leak. It was caked with silicone and didn't look all that pretty. After a lot of prep work I got to painting: This star grid took me 3 hours to complete. I had to start over a few times, but after getting all the dimensions sorted out, I got her on and ready to go. Painting blue! Finished stars! The stripes are on! A close up of the silicone dilemma. I had to add and smooth a paintable silicone over the existing messy silicone to get it as good looking as possible. Hard at work on the lettering! After one more coat on the letters, it will be all done and ready to go home!  

Dehydrated Chicken Foot Tobacco Pipes

Image
I have an obsession with collecting and creating very weird things. One of my favorite creations in the "weird" category are my chicken foot tobacco pipes . These little babies turned out fantastic! And to my surprise, there was a very popular demand for them. This specific pipe was my first and my favorite and also...mine. I don't use it, but I have it on display on my "weird stuff" shelf in my bedroom. My chicken feet *most of which are purchased at the local Asian market, the larger of my feet have been given to me by a local chicken farmer* are cleaned, dehydrated thoroughly, painted, sealed and adhered to the pipes.  Of course I had to add some nail polish, because...plain nails are boring. I had quite a few orders for these pipes, some of which had the middle finger extended with the others curled Some were in all different colors including an orange striped pipe: All in all, they turned out great and I can...

Wood Burned Garden Table With Sewing Machine Legs

Image
~My woodwork~ I have been searching high and low, far and wide, up and down to find legs for this table. I've FINALLY found them! I also finished the burning AND the staining on the top, now I just need to cut a few pieces for the sides, find two metal chairs and seal it up! The top of this fancy table is a section of a small wooden spool that was deconstructed. The other side has been transformed into a mini rocking chair for my wee-est one! The Singer sewing machine legs were the perfect base for this table. A heavy cast iron base that will stand the tests of time and weather in North Dakota. Upcycling at its best: If you're a new "upcycler", you can find amazing things to work with at your local thrift stores. Take a look around at garage sales, in your garage, or even on the side of the road during spring clean up week. You don't need anything flashy and often broken items can still be repurposed into something amazing.  F...

Marble Striping Wood Using Paint

Image
Supersport stripes on a DIY wooden counter tops ? Why not? I covered part of this in another post but thought I'd elaborate in case anyone wants to give it a go. This method could be used on SO many things other than countertops. Hell, you could even marble an entire table if you wish! First thing first - prepare your area. Sand until smooth, fill any holes you wish, and set on a level surface. The next step is to start marking off where you want your strips to go, set a level across it and draw a line. Slowly and carefully, tape your lines. Run your fingernail along the edge of the tape to ensure a tight seal. **DO NOT use cheap tape. You will regret it.** Next , get your "dabber" ready. I used an old washcloth, rolled up and wrapped a hair tie around it to keep it tight. Pick your paint! Try using different shades of the same color, or for a more dramatic look, use contrasting colors. I used a gloss black and a flat gray. The gl...