How to: Handmade journal with an old book cover
~This post contains affiliate links~
Making a journal from an old book cover
Making your own journals can be a fun craft. It's not too difficult, but it does require patience.
Your first journal may require a day or two, but after you get the hang of it - you can knock one out in four hours or less!
Depending on your design, of course)
I'll give you a mini-tutorial on how I put mine together so you have some idea of what you'll be getting into.
What you will need:
1. An old book you can cut the pages out of
2. Utility knife
3. Rubber Cement
4. Hot glue gun and glue sticks
5. Strong thread (heavyweight) or dental floss
6. Sewing needle
7. Underlayment flooring paper roll (you can get a large roll at your local hardware store for under $10. This will give you enough paper to make multiple journals)
8. Iron
9. Patience
10. Optional: Paper cutter
Getting started:
The first thing you want to do is remove the old pages CAREFULLY from your cover. Make sure you don't damage the spine. The front and back covers should stay together.After you've removed the cover, you can set it aside and paint it or leave that step until the end.
The one to the right has been stained in order to preserve some of the book cover's original texture. You can use whatever you like, however, if you are staining your cover make sure you spray seal it as well.
Next up, you will want to measure the front cover and subtract a quarter inch from the height and width. This book is a 5x7 so my pages will end up being 4.75 x 6.75 in order to fit comfortably inside the cover.
When cutting your pages, make sure you double the width so you can fold them in half. These pages were cut/torn at 9.5w x 6.75h.
I used a paper cutter to speed up the process. Hand-torn pages are beautiful but they take a lot of time.
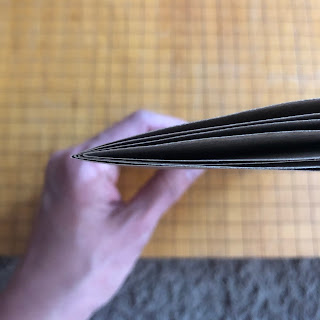
As I cut the pages, I folded and ironed each one and then put them together in "signatures" of four.Signatures are your sections that will be sewed later on. Keep this in mind as you continue to follow along.
After I gathered enough signatures to fit comfortably in my book spine (It's a check as you go process), I stacked them and lined them up the best I could. It won't be perfect if your pages are torn or if your cutter is a hair crooked like mine.
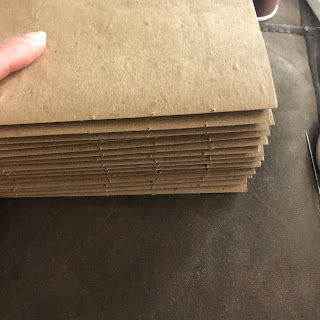
Once stacked, I poked all of my holes for my binding.** This step you will have to give a google. A "simple binding stitch WITHOUT a cover" search will take you where you need to go for hole measurements and quantity. I went with a "Coptic stitch".
As you poke your holes, make sure you place each signature back in the pile in the order you stacked them.
This will ensure that your pages are lined up as straight as they can be for sewing. Now, choose your binding stitch and get sewing!
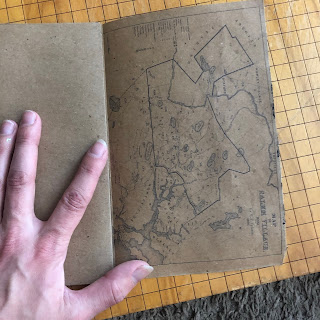
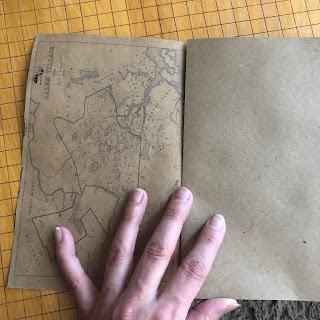
You can choose whatever image you like and feed it through your printer. Image software helps immensely for placement. However, if you're not too picky about it - just trial and error a couple pages and see what you need to do to adjust.
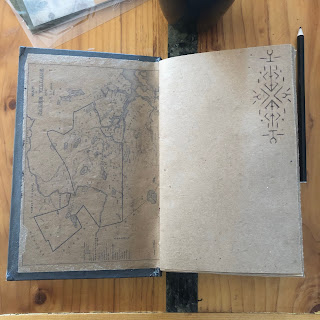
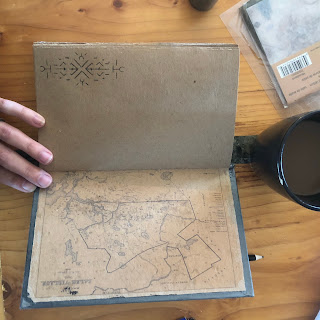
I want these pages to be the first seen when the book is opened and the last seen at the very end.
Luckily, and I don't say this often, my printer didn't like my wrinkled paper and it blotched some ink onto the pages. I love how the blotches turned out on these maps, so it worked out in my favor this time.
What you should do before you move on to the next step is to run a line of hot glue over each line of stitching. Not a heavy line, just something to keep your signatures from moving around too much - especially if your binding is a hair loose. You can weigh it down a little before you glue it to make sure your binding is extra tight.
After you get your binding secured with hot glue, you can attach it to the spine of the book cover. Now, you can use hot glue again here or you can find a craft store that has binding glue in stock. That will hold better than hot glue, but if you don't have any don't worry. The inside cover pages will hold your signatures in place as well.
** My apologies for missing the image for this step.
With your signatures attached to your spine, you can now lay out the first page onto the front cover to see how well the placement will be. If it's a little off, don't worry. It's handmade.After you get an idea of how well it will lay, coat the inside cover with rubber cement (move quickly it dries fast) and lay your page down flat, working out any bubbles you may find.
Once you have your inside page flat, place a piece of tin foil between it and the next page and close the book. Set a weight on top and give it a good 10-15 minutes to dry.
Once your front inside cover page has fully dried (no tacky glue to the touch) you can attach the back cover page.Repeat the process as you did on the front cover.
Once both sides are dry you can spend the rest of your time decorating your new (to you) handmade journal!
Add some cheesecloth with some Elmer's glue to give it some extra texture. Tissue paper works as well and comes in all colors!
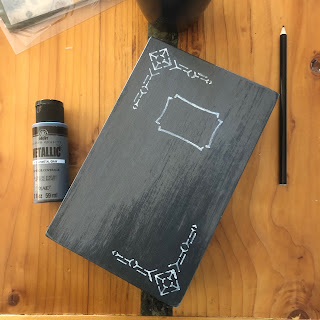
For my end result, I stenciled in some images with a paint marker, added a ribbon bookmark which I secured with cheeses cloth around the spine, and use a little bit of gunmetal gray paint to help it shine:
These journals make great gifts and are a fun addition to your online store. To check out more journals I've made you can visit me here:
http://bohemianheart.storenvy.com/






Comments
Post a Comment